

September 2012 - Who knows how long this will take. In any case, you have to begin, so the first thing is a strongback or frame to hold the boat pieces while they are being bonded together. The strongback and the framework around it which will support the roof or hoop house to protect the boat while it is being made. The 2x6 supports of the strongback are buried in cement.
 |
| Another view |
 |
| Beginning of hoop house |
 |
| And, with ends and a roof |
Then, the boat building can begin.
 |
| Scarfed, ~34 foot long "longitudinals" being glued together from 12 or 16 foot length stock, beneath the bulkheads |
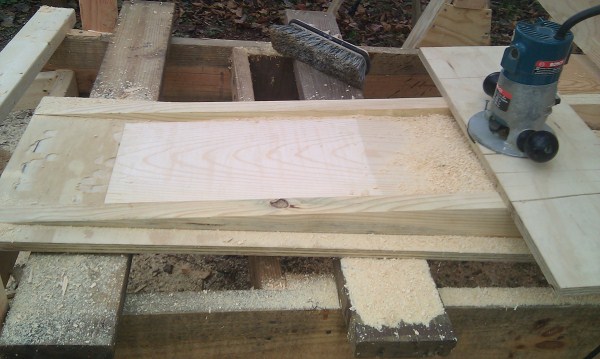 |
| The scarfing jig used to prepare the scarfs |
The longitudinals are 2 x 4's or 1 x 4's or 2 x 10's, 12-16 feet long joined lengthwise to make single piece boards about 34 feet long. These pieces are then joined from stem to stern along the bulkheads. This forms the framework for the boat.
 |
| Longitudinal chines and plank keel clamped to bulkheads |
Somehow, these must all be joined to the inner stem and stern posts which are just pieces of treated wood which look like fence posts. It takes some figuring.
 |
| Chines bolted & bonded to inner stem (treated pine) |
 |
Preparing breasthook and inner stem connection. This will be at the bow-deck connection, it's upside down. |
 |
Bow, sheer clamp, breast-hook connection joined |
 |
Basic framework of boat. Looking at inner stem. |
Next are some details of this framework.
 |
| Detail of stern knee |
 |
Another view of stern knee |
October 2012 - Once the framework of bulkheads, longitudinals and inner stem and stern are all joined, the topsides can be attached to this framework. The topsides are half inch plywood, scarfed on, one after the other.
 |
Two scarfed half-inch marine plywood 4 x 8 sheets, ready to glue to the frame, from sheer clamps to chines. |
Each piece had to be fitted, marked and then scarfed to fit in place perfectly; one after the next. Once each piece was ready at both ends with the scarfs fitting well, it had to be epoxied in place, that is held tightly in p[lace while the epoxy set up. The top and bottom could be screwed easily into the chine logs and sheer clamps to be held in place while hardening. To get the vertical joint where the scarfs overlap, I used two 2 x 4's, one on each side (waxed paper underneath) clamped at top and bottom and screwed where the clamps wouldn't reach.
I'll digress here about screws. I have tried a few types, star drive stainless deck construction, coated deck screws, silicon bronze screws, drywall screws, and a few others. To screw together the 2x4's on the two sides of the panels, I found that 4 inch deck screws worked OK, but you have to be careful the near side 2x4 doesn't rise away from the panel it is up against.
Generally I found the construction stainless and to be useful, and almost always removed them after the epoxy hardened; gluing the two layers of the bottom together, of the sides to the chine logs and sheer clamps, deck to the deck beams and so on.
 |
| Construction stainless screws from Lowes |
I tried the silicon bronze screws for various applications, but found that the drive didn't drive them very well unless the hole was almost completely pre-drilled. They are very beautiful and don't oxidize, so if you have or want to leave them in, it is a good choice.
 |
| Bronze screws |
The screws I found the be the most useful by far are some made by Screw Products. You can see from the image below that they have a long un-threaded portion near the head which keeps them from holding the piece you are attaching away from the beam or chine log or other piece of plywood you are attaching to. This is very helpful! Also, they enter into the beam or chine or whatever very smoothly, and don't tend to ride up initially as the other screws do, often maligning the piece you are attempting to attach somewhat.

Below, you can see the outside 2x4 "clamp" which is screwed (with 4 inch deck screws) to an interior one, pulling the two scarfed pieces of plywood together very tightly.
 |
Second topsides piece glued in place |
 |
Above shows the space where last piece of topsides will be put |
 |
Last piece of topsides attached |
 |
| Double layer bottom, each 3/8th inch, last piece of second layer to go |
 |
13 Jan 2013 - On it goes - sweet |
 |
Topsides & bottom on, outer stem will cover topside edges & inner stem |
 Outer stem has been placed over inner stem and port side wale plank is being glued |
April 2013 - The entire hull is covered with cloth,
two layers on the bottom and three layers at the chines. I put a few
monel staples at each end to hold the cloth in place. Concave curves in
the surface are a problem as the cloth doesn't stick to the wood well. Then it
was coated with clear (no thixogens) epoxy. It took fifteen gallons for the
first coat. You have to really press it hard to saturate into the wood. A
few places where there were concave curves had to be ground out and re-clothed
and re-coated. No big deal, there were only about four places, and most were the size of a grape or an apple. Two were the size of a banana.
After the first coat of clear epoxy, it is mostly like auto
body work or drywall work, put on epoxy mixed with thixogens with a ten-inch
drywall knife, fair it and sand it and put on more and do it again until it
looks pretty good. I found talc to be the most economical "thixogen"
and ended up using about 30 pounds of it mixed in with the epoxy. Sanding, re-coating and more sanding... Three or
four coats of thickened epoxy were put over the first clear coat with the drywall knife, sanding and
fairing each time. Until it looked like this:
 |
Ready for priming |
Ready to prime with Awlgrip 545. Cloth has been covered with three or four layers of epoxy and sanded after each coat. Most of this was done with 80 grit paper using my 8 inch Makita circular sander, then a final once-over with 100 grit using a six inch random orbital sander.
 |
Primed hull - 2 coats of Algrip 545 Primer |
Two coats of primer covered it well, an hour or so apart, more sanding with a 6 inch air sander and 150 grit paper to smooth it out, then getting the area where the topsides and boot stripe will be really smooth with 220 - 320 grit. The 6 inch air palm sander was very good at this.
 |
Water level |
I used a bucket and a twenty-five foot clear hose to draw the water line and boot top on the hull. Reuel suggests putting the painted water line three inches above the actual water line, so I did that. Here it is ready for the boot top to be sprayed on.
 |
Boot top area ready to paint |
Boot top and bottom paint are on, frame to roll it over is in place, all ready to get it upright. Just need a dry day during the week for the crane to get in and out. It has been raining all the time, so, we are still waiting.

Roll Over Time
After a week of rain, on the 28th of May 2013, we take a chance on scheduling the crane to help with the roll-over. The worry is that the crane may not be able to get back up the hill after completing the job. Here follow a few photos of the rolling over process. We used two small 12 volt winches attached to a couple of trees to pull and belay the hull as it is rolled over. We had dug a hole for the bow so it wouldn't touch the ground.
 |
Carlos hooking up the first frame to the spreader bar held by the crane |
 |
Getting ready to pivot on the beam |
 |
Half way there |
 |
Almost on the ground right side up |
 |
The crane, almost made it up the hill. He backed down, and we put about six inches of wood chips on the tracks and then out he went on the next try! |
No comments:
Post a Comment